Add a server
Save a remote machine once, connect with a password or Duo prompt in the page, and open its files from any data field.
Add a machine once and Plexora remembers it. Connecting opens a data node on it (or an SFTP connection), so Plexora keeps running on your computer and the files over there become usable wherever you pick a file.
How to use it
Open Add a server
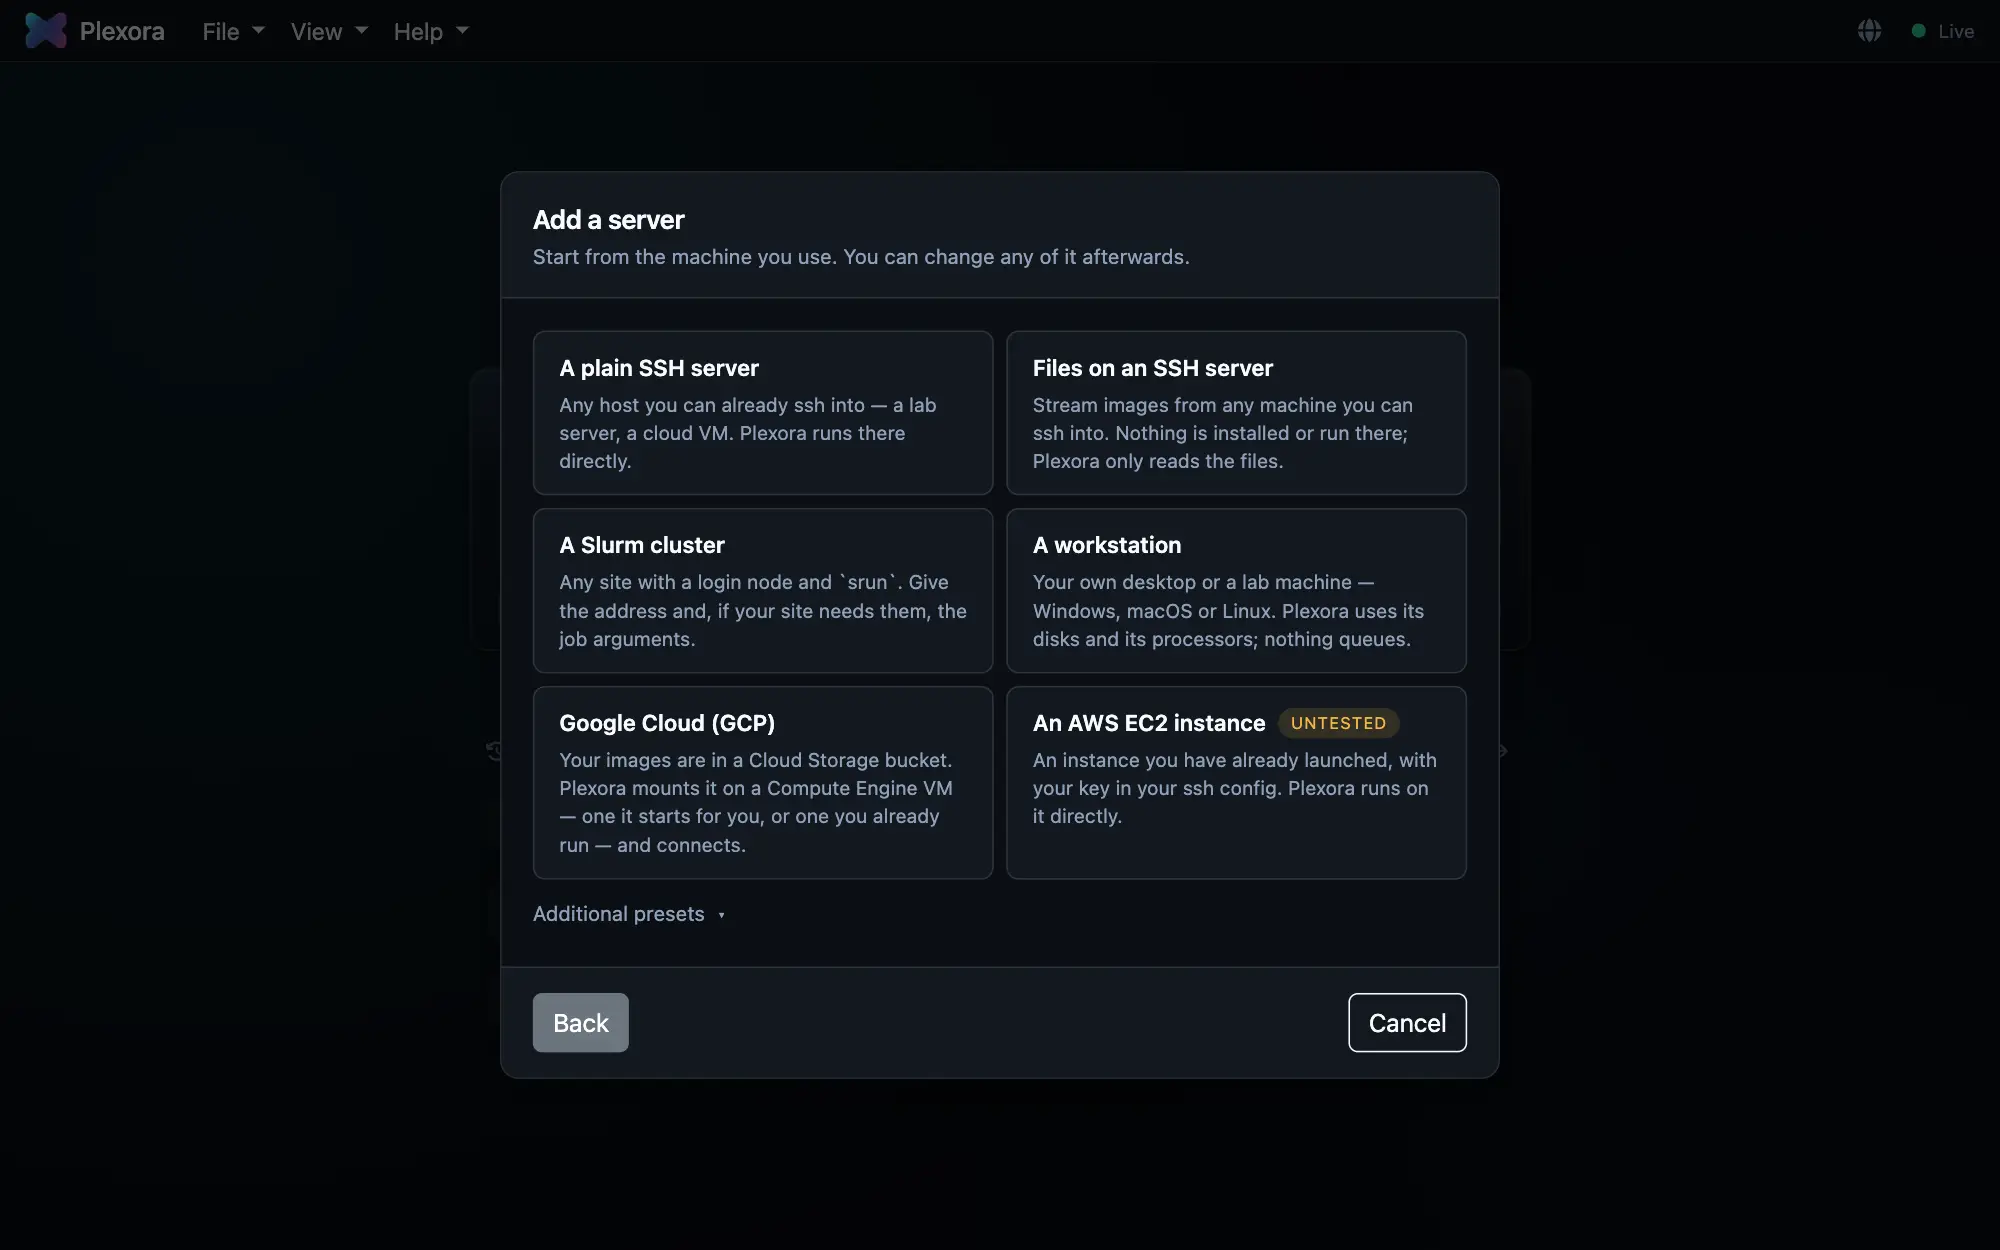
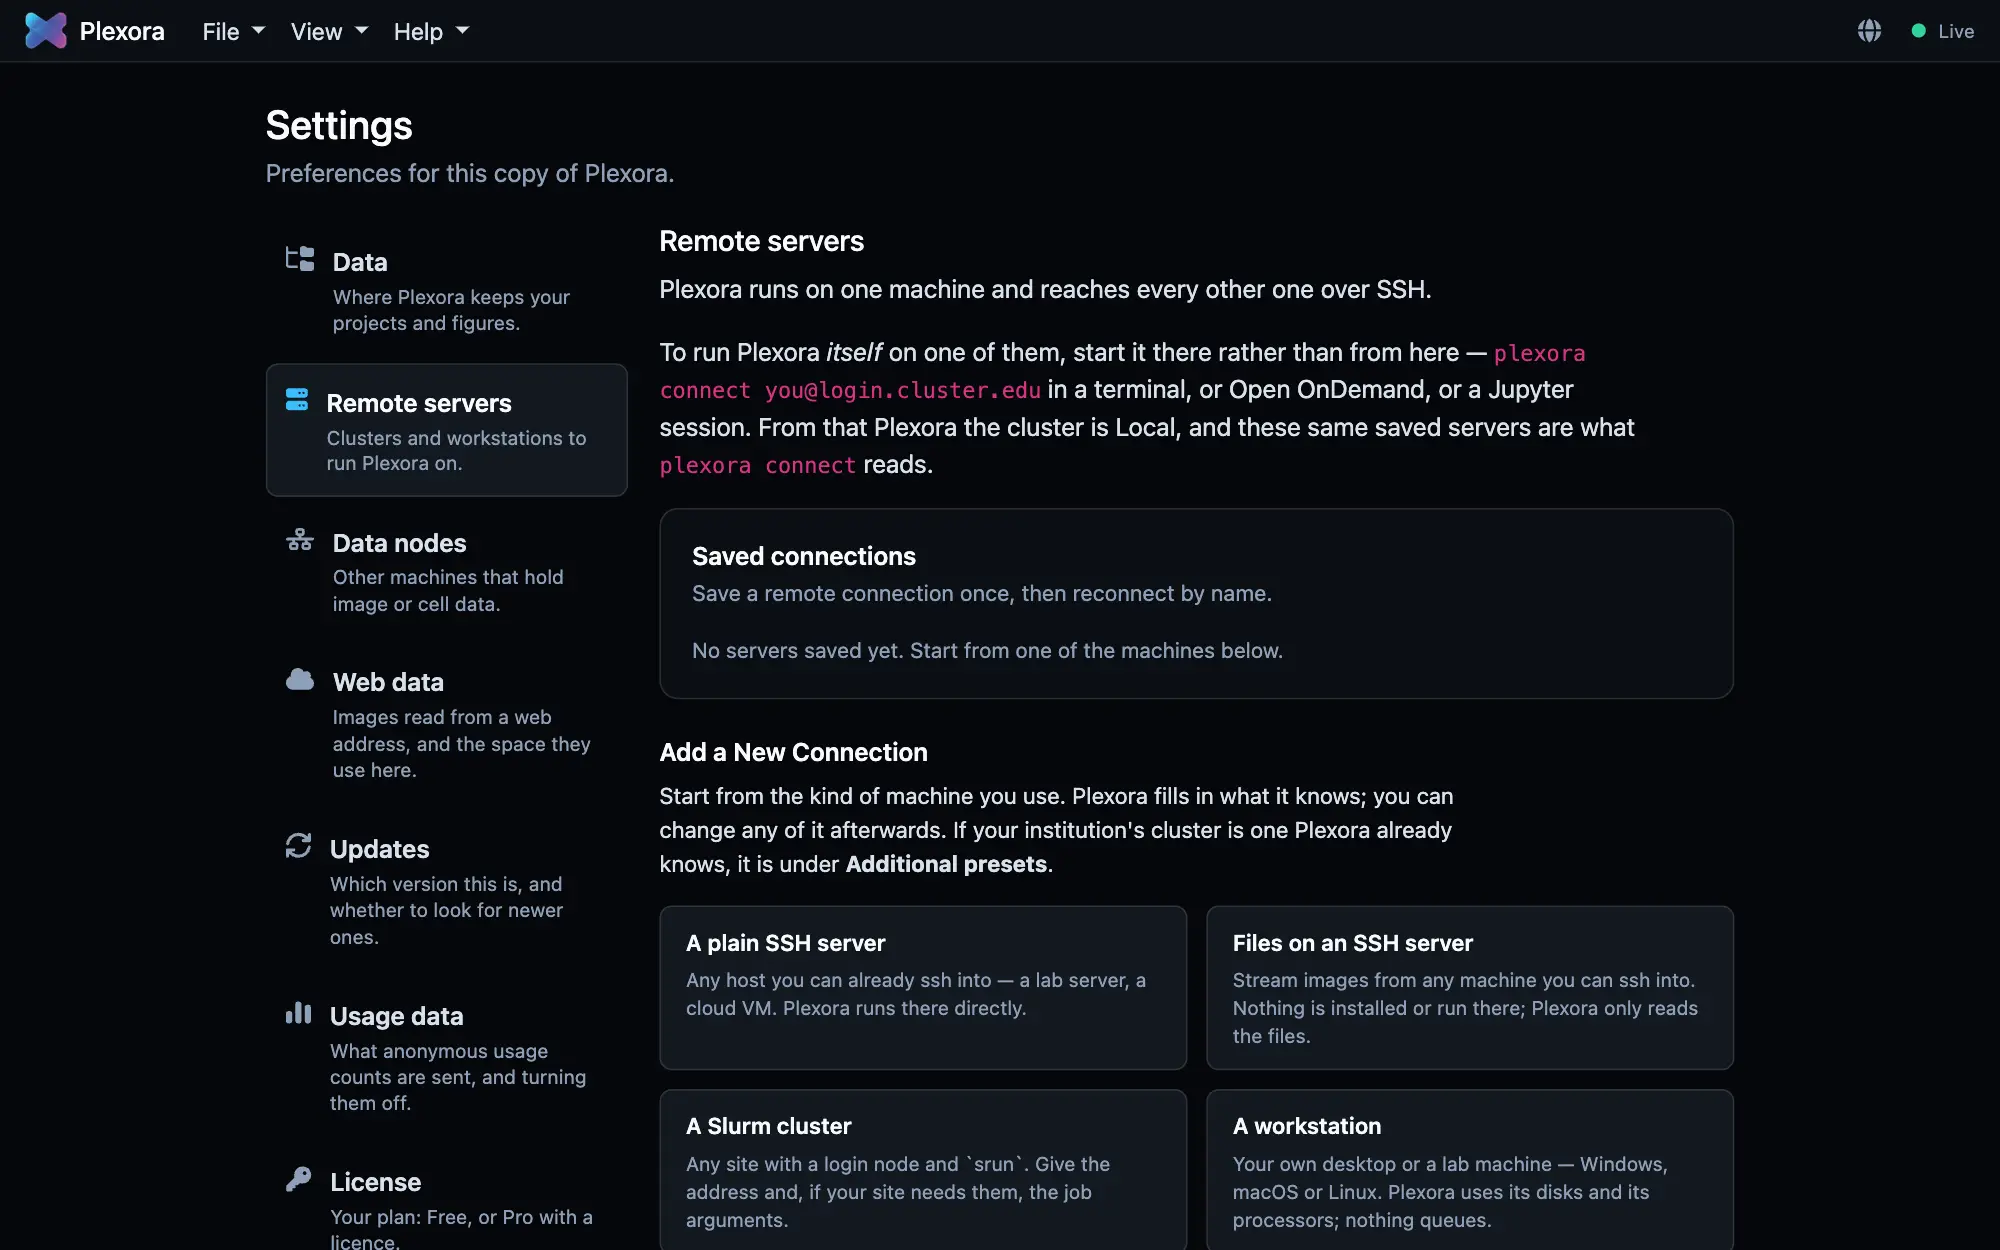
On the home page, click the Local chip in the path box and choose Add a server…. The same item is on every data field in Import Sample… and New Dataset…, and the full list is under Settings › Remote servers › Add a New Connection.
Pick the kind of machine
- A plain SSH server: any host you can already
sshinto, such as a lab server or a cloud VM. - Files on an SSH server: nothing runs there; Plexora only reads the files. See Files over SFTP.
- A Slurm cluster: a login node with
srun. See SLURM clusters. - A workstation: your own desktop or a lab machine running Windows, macOS or Linux.
- Google Cloud (GCP): a bucket mounted on a VM. See Google Cloud.
- An AWS EC2 instance: an instance you have already launched (marked Untested).
If your institution's cluster is one Plexora already knows, it is under Additional presets.
Fill in the form
Name this connection, Your username on that machine and Address are usually all you need. Data directory on this server (optional) says where Plexora keeps projects over there. Under Advanced: Plexora command or environment (set it when a login over SSH cannot find plexora; an environment path is enough), Install or update Plexora (runs pip install --upgrade plexora there first), and Additional port forwarding.
Save and connect
Press Save and connect. The dialog shows each step as it happens: Reaching the machine, Signing in, Opening the tunnel, Starting the data node. A password, a Duo push or a host-key question appears in the dialog exactly as SSH asks it; type your answer there. Continue in background hides the dialog and brings it back if the connection needs you; Stop connecting ends it.
Open files from it
The Local chip now lists the server as Connected. Choose it, and the path box, Browse and Import Sample… work on that machine's files.
Tips
- Settings › Remote servers › Saved connections lists every server with a status dot. Connect and Disconnect are on each card; the pencil edits it and the bin deletes it. Manage servers in the Local chip menu goes straight there.
- For A workstation, the machine needs an SSH server: on macOS turn on System Settings › General › Sharing › Remote Login; on Windows add the OpenSSH Server optional feature and start its service; most Linux systems already run
sshd. - No password is stored. What you type goes to SSH and is cleared.
From the command line
Everything above can also be done from a terminal; you do not need both. A server saved in Settings is also known to plexora connect, and one saved with --save appears in Settings:
plexora connect lab                 # a server saved as "lab"
plexora node connect [email protected] --serve image:tonsil=/data/tonsil.ome.tif --name lab
See Connect from a terminal and Data nodes.