Thresholding
Set a lower and an upper threshold on a marker and see which cells fall inside the gate, drawn over the image.
Thresholding gates one marker at a time: you set a lower and an upper threshold on the marker's distribution, and the cells inside the gate are drawn over the image so you can check the call against the tissue.
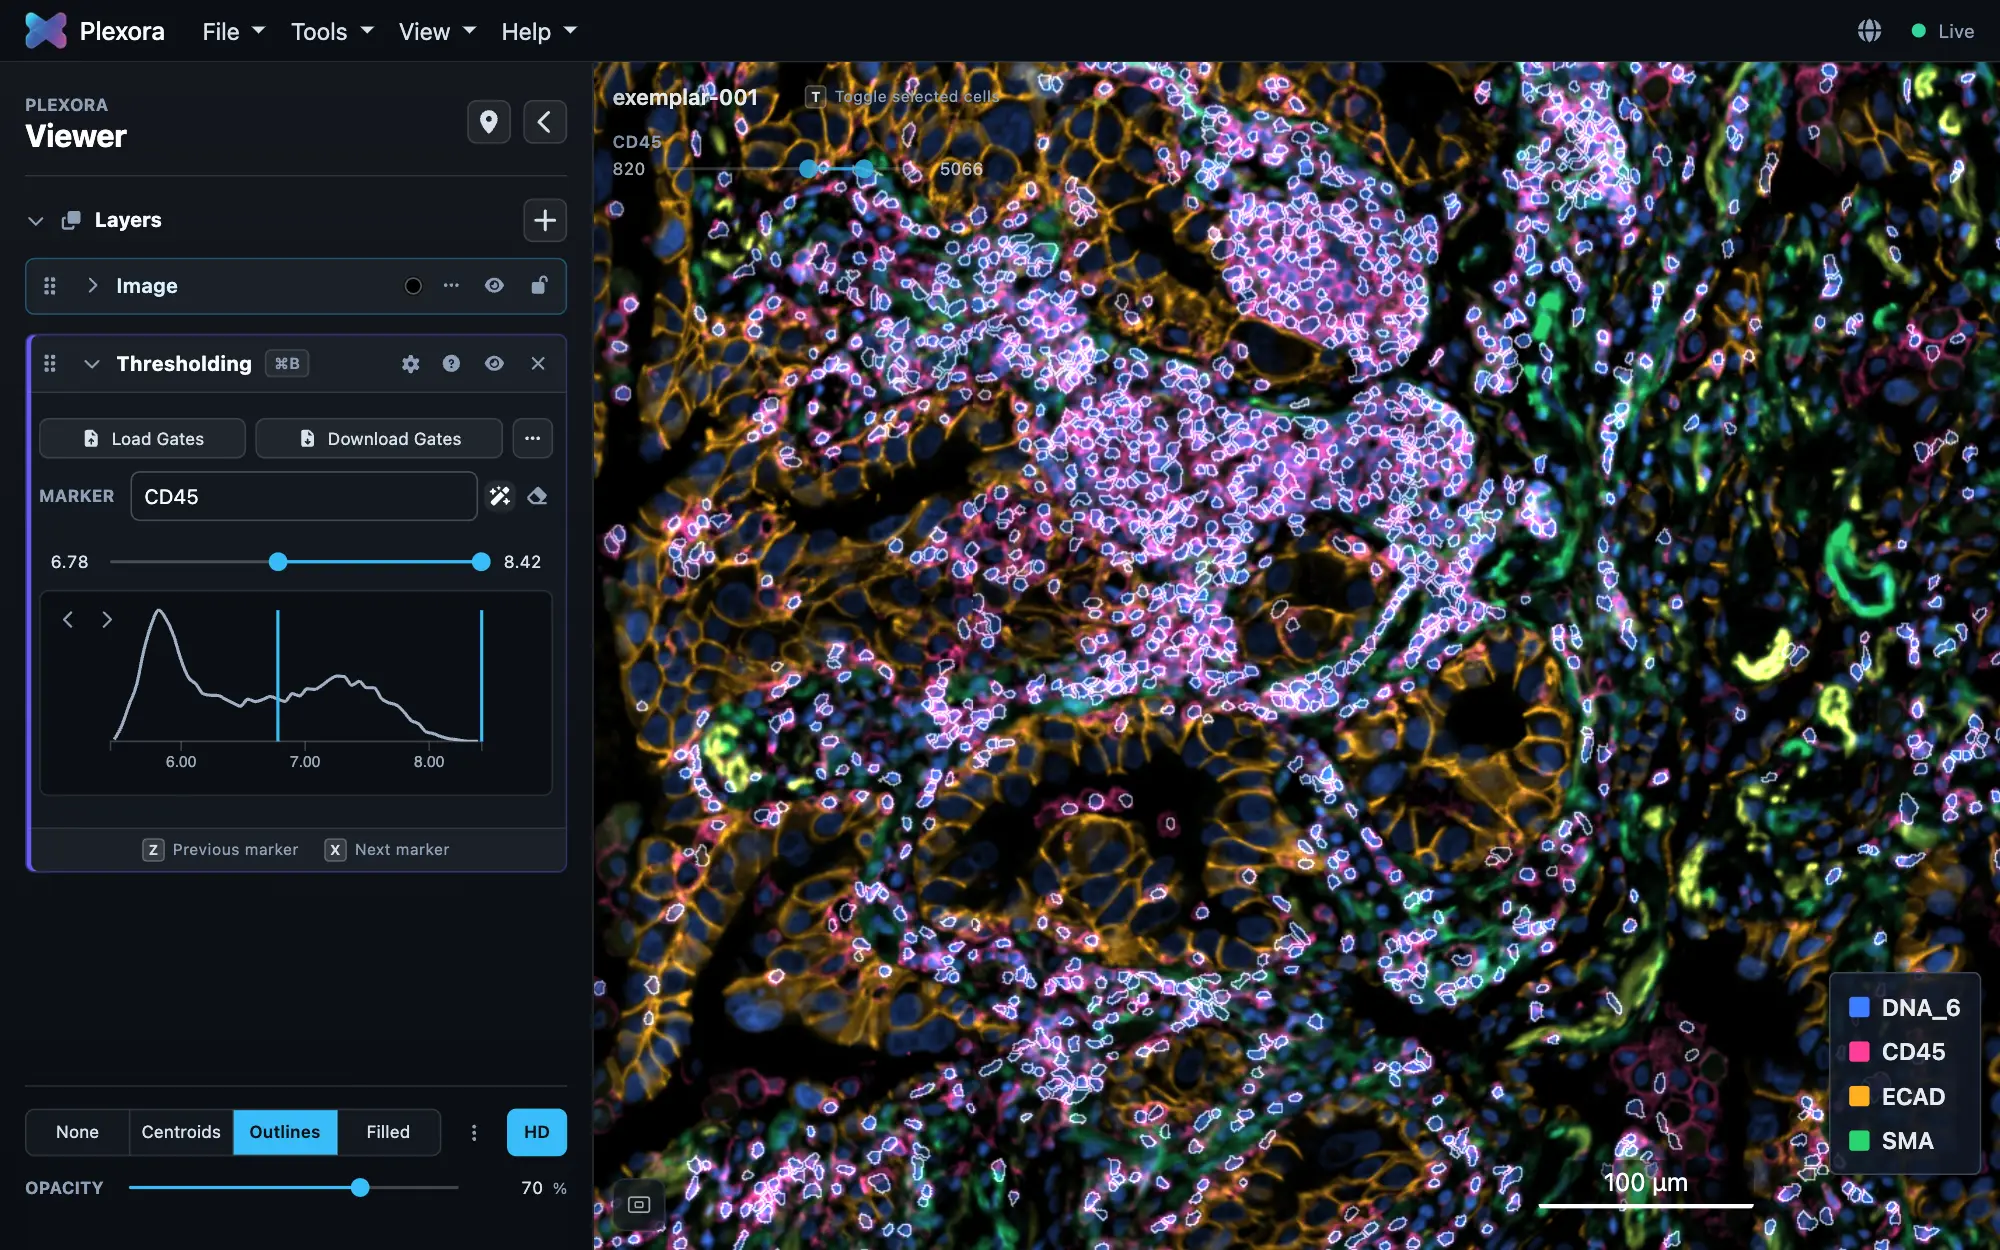
Open it: Tools › Thresholding, or press ⌘B (Ctrl+B on Windows and Linux). It needs a cell table; a segmentation mask is optional (without one, cells are drawn as centroids).
How to use it
Pick a marker
Choose it from Marker. If the marker is also an image channel, Plexora puts it in the first channel slot, so the threshold can be checked against the picture.
Set the gate
Drag either end of the slider, or click a number and type it. The ‹ and › in the corner of the distribution move the lower threshold one step; after a click, the arrow keys keep stepping.
To start from a suggestion instead, press Auto threshold: it fits a threshold to the marker's distribution. The button then becomes Restore previous threshold, so one more press puts your own gate back.
Move through the panel
Press X for the next marker and Z for the previous one. Gates are saved with the sample as you set them; there is nothing to press.
Tips
- How gated cells are drawn (Centroids, Outlines or Filled, point size, opacity) is the Cells row at the bottom of the sidebar, shared with every tool that colours cells.
- Clear one marker's gate with the eraser beside Marker; Clear all gates… is under •••.
- After Quality Control has run, Auto threshold fits on the cells that passed QC and says how many it left out. The gate still applies to every cell.
Keyboard shortcuts
| Key | Action |
|---|---|
| ⌘B (Ctrl+B) | Open or close Thresholding |
| X / Z | Next / previous marker |
| P / N / S | Positive / negative / skip, while reviewing uncertain cells |
| Esc | Stop labelling or reviewing cells |
What it saves
Gates are kept with the project in Plexora's own storage, never in your original files, so the sample reopens with the same gates.
- Download Gates writes a CSV with one row per marker: its lower and upper bound, TRUE if it is gated (empty if not), and who gated it, Plexora AI or User. Load Gates reads that CSV back. When more than one version of the gates is kept, a second CSV comes with it: one row per marker and one column per version, named by who made it and when.
- Save gate version, in the panel's more-actions menu, keeps the gates as they stand. A version is also kept when an automatic gating run finishes, and before a run changes gates you set by hand. The panel always shows the latest gates.
- Save Gates to Source File writes the latest gates into the project's own AnnData or SpatialData file, under a table name you choose (
gatesby default). Beside them it writes where each gate came from (gates_provenance) and, when more than one version is kept, every version (gates_versions, one column per version). It appears only for projects imported from one of those formats.