Channels and contrast
Choose which markers are drawn, give each a colour, and set how bright each one is.
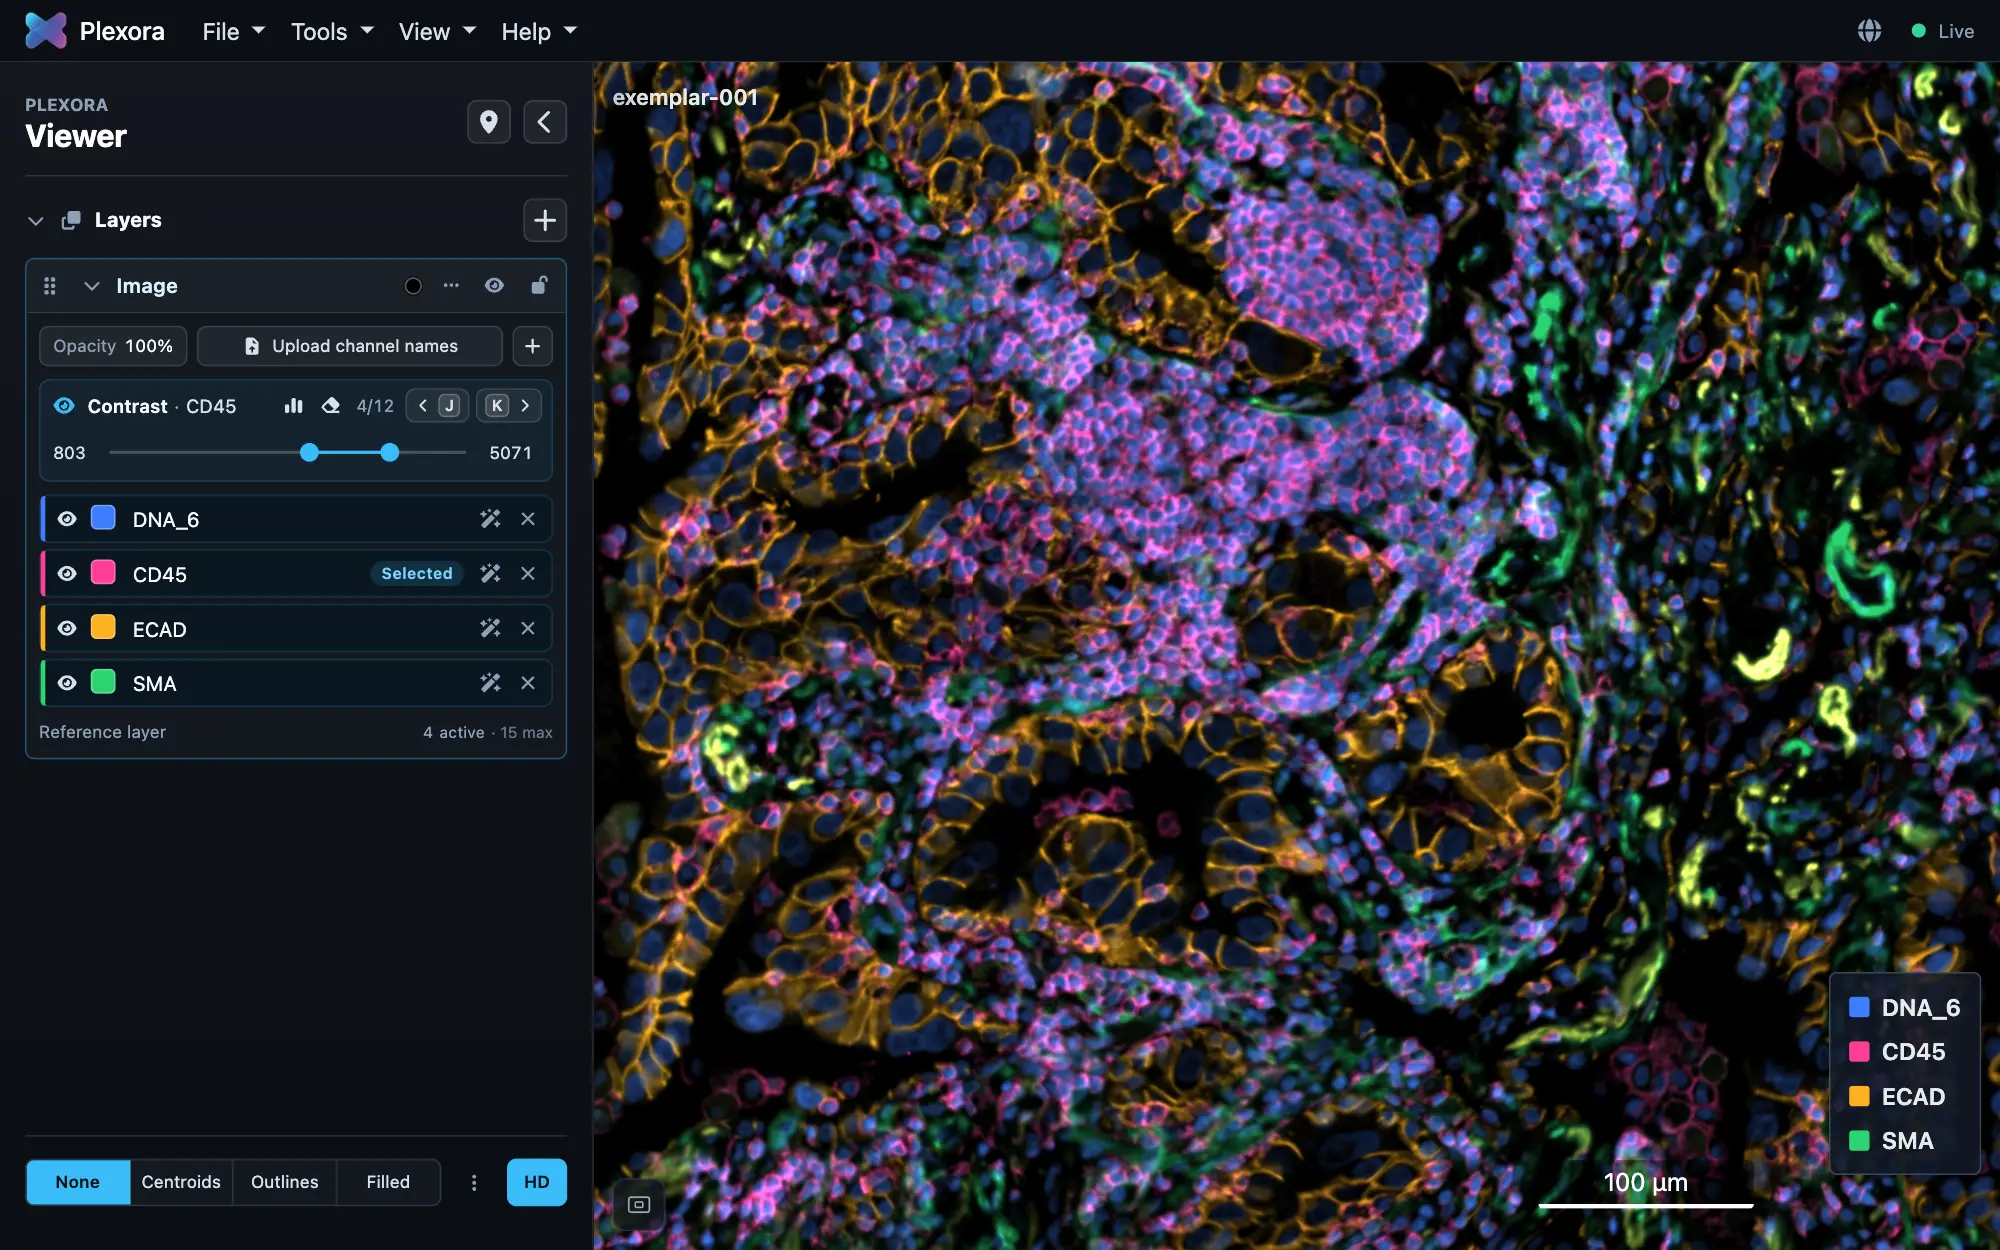
The sidebar's Image card holds one row per channel shown: a marker, its colour and its contrast. Up to 15 rows can be on at once. The contrast bar above the rows sets the window of the selected row. When an image opens, the first row is selected.
How to use it
Pick a marker for a row
Click a row's name and type to search the image's channels. The grey dashed row under the last one shows the next marker that is not in a row yet; click it to add that marker as a new row, switched on. × on a row removes it.
Turn rows on and off
Click a row's eye. Press on one eye and drag down the column to switch several at once. The eye on the contrast bar shows or hides every row.
Choose a colour
Click a row's colour swatch and pick a colour.
Set the contrast
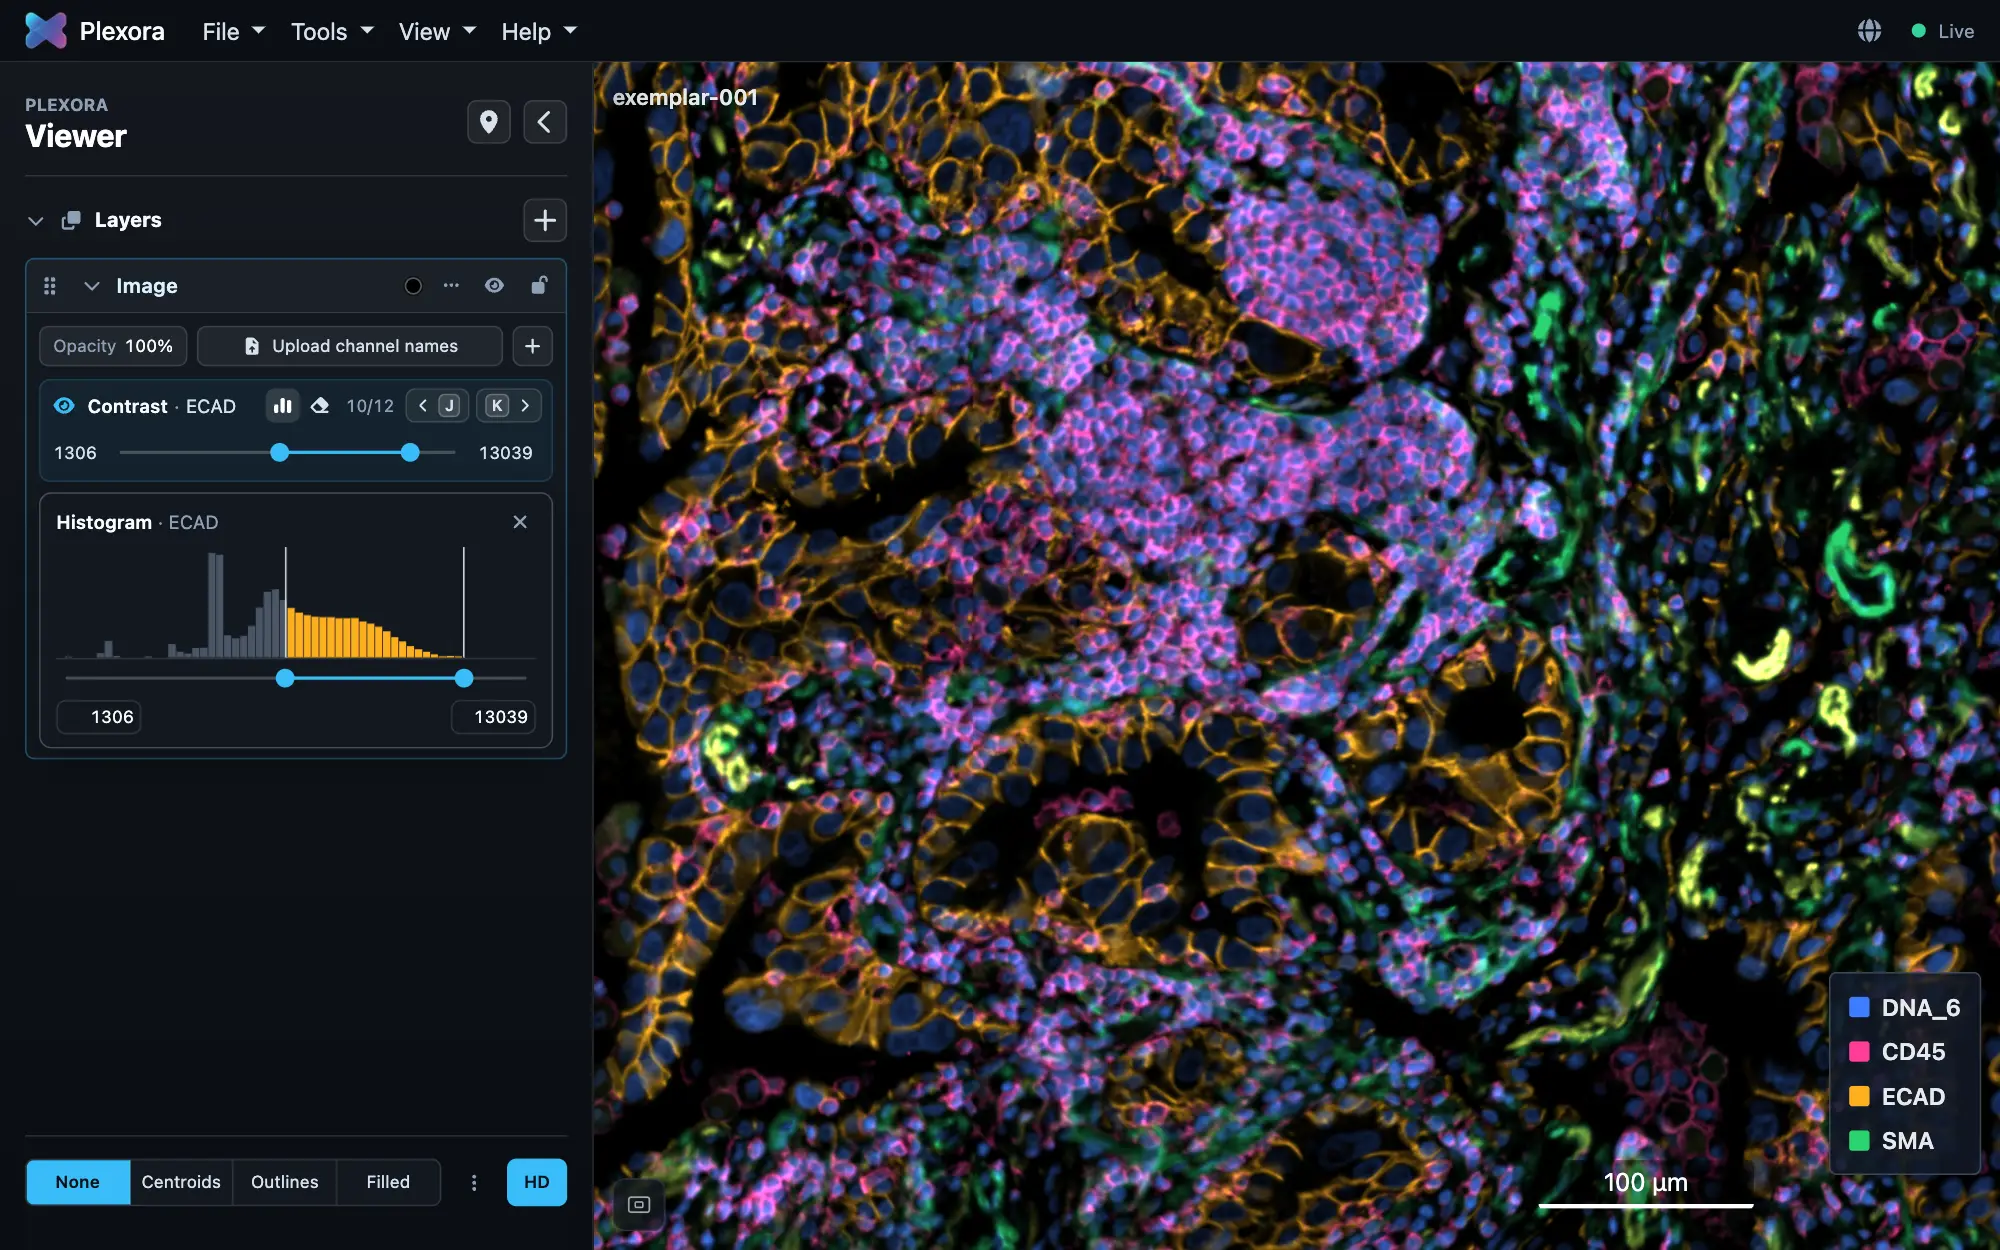
Click a row to select it, then drag the two ends of the bar, or type a number at either end. Histogram shows the channel's distribution under the same range. Clear goes back to the full range; the row's wand (Auto contrast) fits a window for you, and pressed again restores the previous one.
Step through markers
K and J replace the selected row's marker with the next or previous channel, so you can look through a panel one marker at a time. Esc puts back what was there.
Tips
- Drag a row to reorder it.
- Colours, windows and the rows themselves are saved with the sample, so it opens as you left it.
- The ••• menu on the Image card copies channel names or rendering settings to another sample, and turns on Log brightness, which shows dim cells and a faint background without losing bright detail.
- Upload channel names reads names from a CSV or a spreadsheet when the file has none.